Drawing and Writing Together

Tyler, age 5 — This drawing illustrates an event, which Tyler can expand on with his voice or with written words.

Tyler, age 5 — This drawing illustrates an event, which Tyler can expand on with his voice or with written words.


Nurture a love of writing.

Teach children to write by simply talking and writing with them about their drawing. Drawing motivates a child to practice pencil-skills that are needed for writing. Here's how we do it:


Talking

Visual and Verbal


Ask the child to tell you about their drawing. Prompt them with questions, such as, "Who is throwing the ball?" "Who is the boy with the bat?" "The fence looks familiar—where is he playing?" 

The "Boy" lesson is in Draw Write Now, Book 1.

The "Boy" lesson is in Draw Write Now, Book 1.

Some children rarely speak, while others may be very vocal. Talking about a drawing can help both. The quiet child's drawing may become the foundation for a conversation. The talkative child's drawing can be used to help guide and focus their verbal skills.


Pre-Writing

Making the Connection

Demonstrate that the letters people make on paper are the words we speak. Sitting beside the child, ask them to TELL you about their drawing. As they tell you, WRITE their words down, then READ their words back to them, pointing to the words as you read. 

Show the child how to write their name.

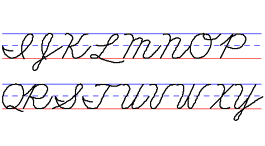
If you are unsure how to form the letters, refer to our instruction on handwriting styles.


Letters

Introduce Letters

As the child shares their drawing, show them how to make and pronounce the first letter of the subjects in the drawing. So, if they have drawn a bird, write the letter "b" while pronouncing the letter.  You might even add "fl" for "flying." (Include blended letters, like “th”, "br" "wh".)

LOWERCASE LETTERS: Demonstrate using lowercase letters, rather than capital. Most of our writing is lowercase.

Plain paper is fine—there is no need to use guideline paper at this stage.


Words

Introduce Words

When the child shows you their drawing, choose a word and show them how to correctly form and pronounce each letter in a word. "Here's how to write the word "ball"—b-a-l-l." 


SPACING OF LETTERS: Explain that letters in a word are grouped together without spaces. The letters are written side-by-side to form the word.

Plain paper without lines is fine.


Sentences

Introduce Sentences

"It's not hard to show a child how to form letters, the challenge is motivating them to practice."

After drawing a picture, demonstrate how to write a short sentence, such as “We like to play ball.” Highlight the basic parts of a sentence:

  • The first letter of the first word in a sentence is a capital letter.
  • Spaces separate words.
  • A period is at the end of the sentence.

SPACES BETWEEN WORDS:  Explain that words are separated by spaces.

Introduce guideline or lined paper.


More Sentences

Copy Work, Practice
 

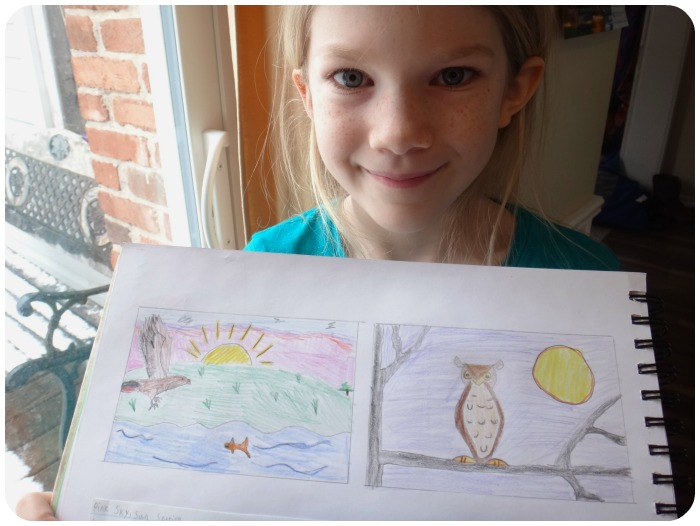
Matthew, age 7Drawing makes handwriting practice fun!

Matthew, age 7
Drawing makes handwriting practice fun!

Tiger Lesson is in Draw Write Now, Book 7

Tiger Lesson is in Draw Write Now, Book 7

Practice writing two to four short sentences. The sentences can be about their drawing or can be a memory verse. The sentences should be simple to copy.

Draw Write Now lessons have four short sentences. The sentences may be changed, but keep the sentences short and simple. This practice time is for developing handwriting skills, not vocabulary, composition or spelling.

Have the child critique their work.

  • Ask them to choose their best letters or words.
  • Point out things they can improve.

There's no need to erase and do over, it is simply a time to become aware for the next time they practice.

Matthew, age 7

Matthew, age 7

Is the child reluctant to practice writing? Work for success, but push them a bit. If you know they can write one sentence, have them write two short sentences. Lesson to lesson, increase the amount of writing.

Use the coloring time as an incentive — remind them that you’ll bring out the crayons (or color pencils, watercolors, etc.) after the sentences are finished.


Composition

Telling a Story

Self-Editing

Encourage the child to write about their drawing. Oftentimes, their background drawing will prompt them to write. 

Since the focus is composition, this is not a time to stress careful handwriting! It is not spelling or vocabulary-time. Let them write. Let them get their ideas down on paper.

Does the child love to write, but spelling or grammar needs some refining? After writing and reading their story, help them select a few sentences.  Correct any spelling or grammar errors in those sentences.

EXTRA: Have the child copy a few corrected sentences onto a fresh sheet of paper using their best handwriting. 


Grammar or Spelling

Exercises

GRAMMAR: Ask the child to write all the nouns in their drawing (boy, bird, fence, grass, ball.)

Another time, have the child write all the verbs (fly, hit, swing, stand, look, throw) or all the adjectives (fast, sunny, happy, green.)

SPELLING: Words that are spelled incorrectly can be added to a spelling list to practice later.


Paragraphs

Focusing

Have the child write a paragraph about the subject in their drawing.

  • Introduce the subject. (The boy loves playing baseball.)
  • Write several sentences to support the introductory sentence. (The first pitch was thrown. He swung and the ball went far into the outfield. He ran so fast around the bases.)
  • Write a closing sentence restating the first sentence. (He wants to play baseball every day of his life.)

WRITING PROMPTS: A mother shared that she brings out the Draw Write Now set of books, announce the theme, such as “Springtime." Her three boys flip through the books, each choosing a drawing that makes them think of Spring—a rabbit, a bird and a boat. Their finished drawing becomes their prompt for writing a paragraph on Spring.


"It's fun to draw and write with a child."


Hold the Pencil

We send our booklet, Hold the Pencil, in every order we ship. Get it with an order or download it now...FREE (pdf, 493 pdf)

It was hard to hold my pencil like this at first, but I kept trying. Now I do it all the time.
— Sarah, first-grade student
It was easy. My daughter changed her grip within two weeks.
— Carol, mom of a 5 year-old


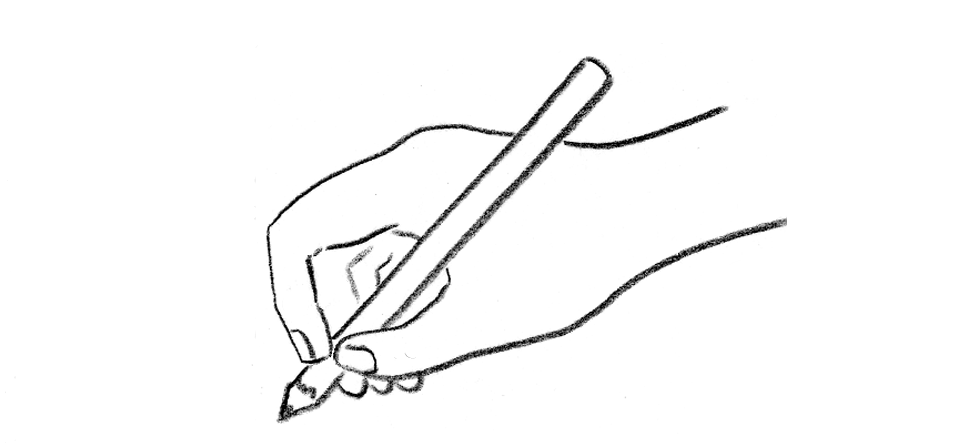
Some children easily transition to the Tripod Grasp. For others, it is a challenge to keep the fingers in the tripod position. There are a variety of tools available to help keep the fingers in place. They are temporary tools, much like training wheels on a bicycle.

Training Tools 

Training Tools 


How hard is it to change the grip?

Easiest

Some children use the tripod grasp naturally. Others may simply need to be shown and encouraged to practice.


Easy

Some children might benefit with a triangular shaped pencil as a little reminder to keep the fingers in a tripod position. Also, there are grippers that slip onto a pencil to make it triangular.

Triangular-shaped pencils help establish the tripod grasp.

Triangular-shaped pencils help establish the tripod grasp.


Extra Training

Grippers with indentations or cups for the fingers help those who have a hard time keeping the fingers in place.

Pencil Grippers help keep the fingers in position.

Pencil Grippers help keep the fingers in position.


OLD HABITS

The Twist n' Write Pencil takes a different approach on holding the pencil and helps those who have established a grasp that is harder to change.

Twist n' Write helps children who have established an odd grasp and are having a hard time changing to the tripod grasp.


"The new grip will probably feel uncomfortable at first."

At first, my son said that the pencil with the pencil gripper was uncomfortable. I explained that he was familiar with the other way of holding a pencil and that as he got accustomed to the new grip it would feel better. He used the pencil with the gripper only when we sat down together to draw. I ignored how he held the pencil at other times of the day.

After about six weeks, during a time when he was drawing on his own, I noticed that he held his pencil (no gripper) using the tripod grip. I said, “Look how you are holding your pencil.” He looked down at his hand and said, “I didn’t mean to do it!” We practiced together with the gripper a few more weeks, until he realized that he really didn’t need it anymore.

The gripper was temporary—like using training wheels on a bike.
— Kim Stitzer, mother of a five year-old

Marie's Story


My mother, Marie Hablitzel, was a second grade school teacher. Her students remember starting each school day with a drawing lesson. After she retired, we coauthored the Draw Write Now series. 

Bob and Marie


Marie enjoyed three-mile walks up until a few weeks before her death in 2007 at the age of 86. I was blessed to have the opportunity to work with her and am honored to continue her work.

— Kim Stitzer