My child is 10

“My child is 10 and she hates writing.
What can I do to help?”

Focus on drawing and add a little writing on the side! Keep in mind that an older child’s handwriting habits are pretty well ingrained, making changes can take longer. Be patient, have fun and plan to practice regularly and carefully.

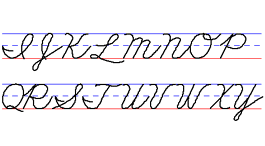
Handwriting Practice

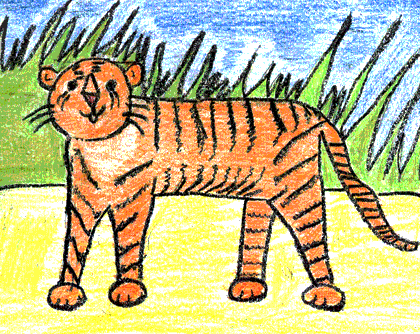
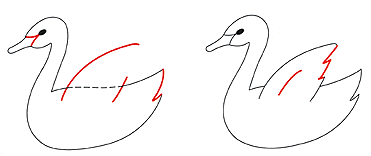
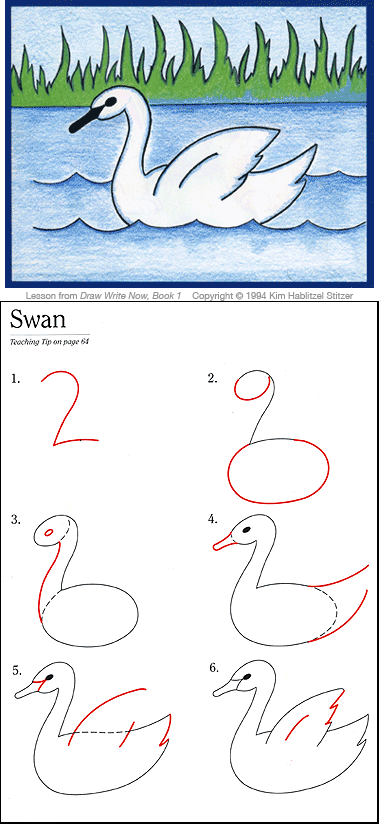
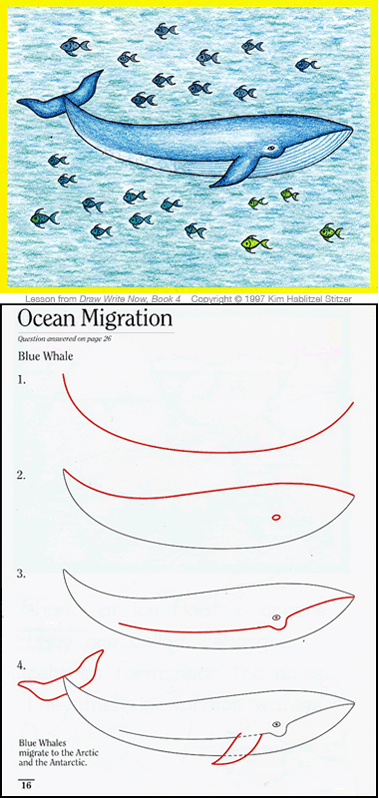
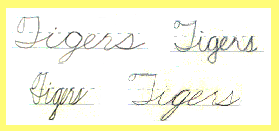
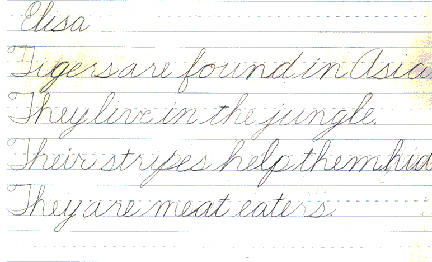
Somewhere along the line, your child may have missed some basic skills. Start by gaining an understanding of the progression of language arts skills. Keep this in mind as you draw and write with her. Start with the sample lessons of the swan (Book 1), whale (Book 4) and tiger (Book 7). Keep the practice time short, easing into more writing as her skills improve. Find more lessons in the Draw Write Now books. An older child is able to do any of the lessons in the series, so look at the Table of Contents and select a book that she finds most interesting.
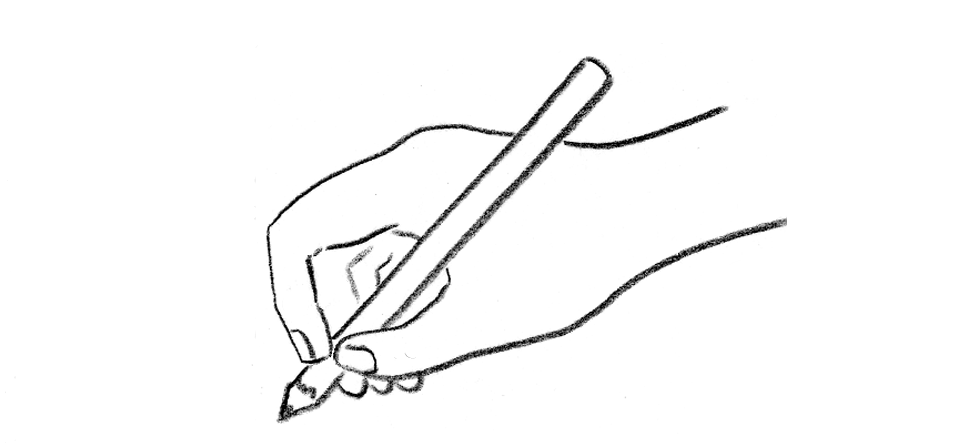
Pencil Grasp

Look at how she holds her pencil. The older the child, the stronger the habits, so don’t expect her grasp to be corrected within a week. Exercises to improve fine motor skills can help.

Posture

She may need help with her posture. Exercises to improve gross motor skills will help.

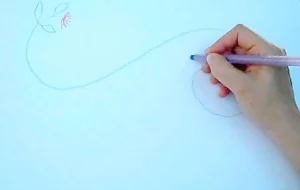
If your child bristles at the idea of writing practice, drawing may be the thing that motivates her to put a pencil to paper. The skills of handwriting and drawing are similar, so there will be some improvement even if she doesn’t write a word! 

Drawing and Writing Together

Tyler, age 5 — This drawing illustrates an event, which Tyler can expand on with his voice or with written words.

Tyler, age 5 — This drawing illustrates an event, which Tyler can expand on with his voice or with written words.


Nurture a love of writing.

Teach children to write by simply talking and writing with them about their drawing. Drawing motivates a child to practice pencil-skills that are needed for writing. Here's how we do it:


Talking

Visual and Verbal


Ask the child to tell you about their drawing. Prompt them with questions, such as, "Who is throwing the ball?" "Who is the boy with the bat?" "The fence looks familiar—where is he playing?" 

The "Boy" lesson is in Draw Write Now, Book 1.

The "Boy" lesson is in Draw Write Now, Book 1.

Some children rarely speak, while others may be very vocal. Talking about a drawing can help both. The quiet child's drawing may become the foundation for a conversation. The talkative child's drawing can be used to help guide and focus their verbal skills.


Pre-Writing

Making the Connection

Demonstrate that the letters people make on paper are the words we speak. Sitting beside the child, ask them to TELL you about their drawing. As they tell you, WRITE their words down, then READ their words back to them, pointing to the words as you read. 

Show the child how to write their name.

If you are unsure how to form the letters, refer to our instruction on handwriting styles.


Letters

Introduce Letters

As the child shares their drawing, show them how to make and pronounce the first letter of the subjects in the drawing. So, if they have drawn a bird, write the letter "b" while pronouncing the letter.  You might even add "fl" for "flying." (Include blended letters, like “th”, "br" "wh".)

LOWERCASE LETTERS: Demonstrate using lowercase letters, rather than capital. Most of our writing is lowercase.

Plain paper is fine—there is no need to use guideline paper at this stage.


Words

Introduce Words

When the child shows you their drawing, choose a word and show them how to correctly form and pronounce each letter in a word. "Here's how to write the word "ball"—b-a-l-l." 


SPACING OF LETTERS: Explain that letters in a word are grouped together without spaces. The letters are written side-by-side to form the word.

Plain paper without lines is fine.


Sentences

Introduce Sentences

"It's not hard to show a child how to form letters, the challenge is motivating them to practice."

After drawing a picture, demonstrate how to write a short sentence, such as “We like to play ball.” Highlight the basic parts of a sentence:

  • The first letter of the first word in a sentence is a capital letter.
  • Spaces separate words.
  • A period is at the end of the sentence.

SPACES BETWEEN WORDS:  Explain that words are separated by spaces.

Introduce guideline or lined paper.


More Sentences

Copy Work, Practice
 

Matthew, age 7Drawing makes handwriting practice fun!

Matthew, age 7
Drawing makes handwriting practice fun!

Tiger Lesson is in Draw Write Now, Book 7

Tiger Lesson is in Draw Write Now, Book 7

Practice writing two to four short sentences. The sentences can be about their drawing or can be a memory verse. The sentences should be simple to copy.

Draw Write Now lessons have four short sentences. The sentences may be changed, but keep the sentences short and simple. This practice time is for developing handwriting skills, not vocabulary, composition or spelling.

Have the child critique their work.

  • Ask them to choose their best letters or words.
  • Point out things they can improve.

There's no need to erase and do over, it is simply a time to become aware for the next time they practice.

Matthew, age 7

Matthew, age 7

Is the child reluctant to practice writing? Work for success, but push them a bit. If you know they can write one sentence, have them write two short sentences. Lesson to lesson, increase the amount of writing.

Use the coloring time as an incentive — remind them that you’ll bring out the crayons (or color pencils, watercolors, etc.) after the sentences are finished.


Composition

Telling a Story

Self-Editing

Encourage the child to write about their drawing. Oftentimes, their background drawing will prompt them to write. 

Since the focus is composition, this is not a time to stress careful handwriting! It is not spelling or vocabulary-time. Let them write. Let them get their ideas down on paper.

Does the child love to write, but spelling or grammar needs some refining? After writing and reading their story, help them select a few sentences.  Correct any spelling or grammar errors in those sentences.

EXTRA: Have the child copy a few corrected sentences onto a fresh sheet of paper using their best handwriting. 


Grammar or Spelling

Exercises

GRAMMAR: Ask the child to write all the nouns in their drawing (boy, bird, fence, grass, ball.)

Another time, have the child write all the verbs (fly, hit, swing, stand, look, throw) or all the adjectives (fast, sunny, happy, green.)

SPELLING: Words that are spelled incorrectly can be added to a spelling list to practice later.


Paragraphs

Focusing

Have the child write a paragraph about the subject in their drawing.

  • Introduce the subject. (The boy loves playing baseball.)
  • Write several sentences to support the introductory sentence. (The first pitch was thrown. He swung and the ball went far into the outfield. He ran so fast around the bases.)
  • Write a closing sentence restating the first sentence. (He wants to play baseball every day of his life.)

WRITING PROMPTS: A mother shared that she brings out the Draw Write Now set of books, announce the theme, such as “Springtime." Her three boys flip through the books, each choosing a drawing that makes them think of Spring—a rabbit, a bird and a boat. Their finished drawing becomes their prompt for writing a paragraph on Spring.


"It's fun to draw and write with a child."


Swan Lesson, Draw-Write-Now, Book 1

Draw Your World: Swan Drawing Lesson from Draw-Write-Now, Book 1.

Draw Your World: Swan Drawing Lesson from Draw-Write-Now, Book 1.

The lessons are simple and clean. This is how the swan lessons appears in Draw-Write-Now, Book 1. CLICK IMAGE TO ENLARGE 

TEACHING TIPS

Our lessons are flexible and simple. Keep it easy—pick up a lesson and draw! All that is needed is a pencil, eraser, paper and crayons (or a coloring medium of your choice.)

1.) Introduce the Subject

Garner interest in wild or domestic swans with a story, discussion, poem, photos or a song. 

2.) Draw the Subject

Using a pencil, encourage the children to draw the swan lightly, because some lines will be erased (see Step 3.) Use the step-by-step instructions—the red lines—to draw the subject. Throughout the building of the swan, refer to the color drawing, pointing out the shapes and lines.

3.) Draw the Background

Still working in pencil, encourage the children to create their own background for the drawing. If they want to copy what they see in the sample color drawing, that's fine. With time and a little encouragement, their own creativity will take hold.

4.) Practice Writing

See Drawing and Writing Together. Scroll down the list and find where your child fits. Is your child just learning to write letters? Are they able to write, but don't like to practice? Do they need to work on forming paragraphs? Children of varying ages and skill levels can work together during drawing time, and at their own pace during writing time.

5.) Color the Picture

This is the fun time! The child colors their creation. You may notice that the drawings shown in our Gallery are outlined in black. Introduce outlining and see how it helps preserve the details the child has so carefully drawn in pencil. It also makes colors pop!

Practice writing sentences, learning to write letters, or crafting a paragraph.

Practice writing sentences, learning to write letters, or crafting a paragraph.


Hold the Pencil

We send our booklet, Hold the Pencil, in every order we ship. Get it with an order or download it now...FREE (pdf, 493 pdf)

It was hard to hold my pencil like this at first, but I kept trying. Now I do it all the time.
— Sarah, first-grade student
It was easy. My daughter changed her grip within two weeks.
— Carol, mom of a 5 year-old


Some children easily transition to the Tripod Grasp. For others, it is a challenge to keep the fingers in the tripod position. There are a variety of tools available to help keep the fingers in place. They are temporary tools, much like training wheels on a bicycle.

Training Tools 

Training Tools 


How hard is it to change the grip?

Easiest

Some children use the tripod grasp naturally. Others may simply need to be shown and encouraged to practice.


Easy

Some children might benefit with a triangular shaped pencil as a little reminder to keep the fingers in a tripod position. Also, there are grippers that slip onto a pencil to make it triangular.

Triangular-shaped pencils help establish the tripod grasp.

Triangular-shaped pencils help establish the tripod grasp.


Extra Training

Grippers with indentations or cups for the fingers help those who have a hard time keeping the fingers in place.

Pencil Grippers help keep the fingers in position.

Pencil Grippers help keep the fingers in position.


OLD HABITS

The Twist n' Write Pencil takes a different approach on holding the pencil and helps those who have established a grasp that is harder to change.

Twist n' Write helps children who have established an odd grasp and are having a hard time changing to the tripod grasp.


"The new grip will probably feel uncomfortable at first."

At first, my son said that the pencil with the pencil gripper was uncomfortable. I explained that he was familiar with the other way of holding a pencil and that as he got accustomed to the new grip it would feel better. He used the pencil with the gripper only when we sat down together to draw. I ignored how he held the pencil at other times of the day.

After about six weeks, during a time when he was drawing on his own, I noticed that he held his pencil (no gripper) using the tripod grip. I said, “Look how you are holding your pencil.” He looked down at his hand and said, “I didn’t mean to do it!” We practiced together with the gripper a few more weeks, until he realized that he really didn’t need it anymore.

The gripper was temporary—like using training wheels on a bike.
— Kim Stitzer, mother of a five year-old

Whale Lesson, Draw-Write-Now 4

Draw Write Now, Book 4: Whale lesson

Draw Write Now, Book 4: Whale lesson

The lessons are simple and clean. This is how the swan lessons appears in Draw-Write-Now, Book 1. CLICK IMAGE TO ENLARGE 

TEACHING TIPS

Our lessons are flexible and simple. Keep it easy—pick up a lesson and draw! All that is needed is a pencil, eraser, paper and crayons (or a coloring medium of your choice.)

1.) Introduce the Subject

Garner interest in the blue whale and the animals and people who live in the polar regions with a story, discussion, poem, photos or a song. 

2.) Draw the Subject

Using a pencil, encourage the children to draw the whale lightly, because some lines will be erased (see Step 3.) Use the step-by-step instructions—the red lines—to draw the subject. Throughout the building of the whale, refer to the color drawing, pointing out the shapes and lines.

3.) Draw the Background

Still working in pencil, encourage the children to create their own background for the drawing. If they want to copy what they see in the sample color drawing, that's fine. With time and a little encouragement, their own creativity will take hold.

4.) Practice Writing

See Drawing and Writing Together. Scroll down the list and find where your child fits. Is your child just learning to write letters? Are they able to write, but don't like to practice? Do they need to work on forming paragraphs? Children of varying ages and skill levels can work together during drawing time, and at their own pace during writing time.

5.) Color the Picture

This is the fun time! The child colors their creation of the Blue Whale. You may notice that the drawings shown in our Gallery are outlined in black. Introduce outlining and see how it helps preserve the details the child has so carefully drawn in pencil. It also makes colors pop!

Practice writing sentences, learning to write letters, or crafting a paragraph.

Practice writing sentences, learning to write letters, or crafting a paragraph.


Handwriting Styles

Which handwriting style should your child learn?

Teaching a child to write their name and first words is fun and easy, but before you get too far along, be aware that there are a variety of types of handwriting— they are called handwriting styles.

Four children wrote the word "Tiger." They were all taught the same handwriting style.

Four children wrote the word "Tiger." They were all taught the same handwriting style.

Ask Your Local School

Primary or elementary schools agree on one handwriting style to teach—at least they should. If your preschool child is eager to write or your child is already attending school, but you don't know which style is used, contact the local school office and ask.

Homeschooling

Homeschool parents—you get to decide! It's nice to find a style that appeals to each child, but I've found that it makes sense to stick to one style for the family.

The Left-Handed Child

With any handwriting style, there is a slight modification that can help a left-handed child write more smoothly. It's simple—pull the pencil toward the hand when making horizontal lines. For example, a right-handed writer crosses the letter “t” from left to right. For the left-handed, the letter is crossed from right to left. The following letters are affected:

Lowercase letters: t, f
Capital letters: A, E, F, H, I, J, T.

Manuscript Only?

Handwriting styles are designed with a manuscript (print) and a cursive (linked) form. Progressing to the cursive or linked form is the goal, as it is the quicker or more fluid form of handwriting. Today, many children get handwriting instruction and practice for only a few years at best and may not get instruction in cursive. I encourage teachers and parents to include regular handwriting practice into sixth grade. Keep practice time short—ten to fifteen minutes. For older children, practice time may be only once a week.

Begin with Cursive?

Yes, it is fine to start in cursive, and most children love it. When Marie was a child in the 1920’s, all her handwriting was in cursive. Manuscript was introduced later and used for labeling maps or posters.

A handwriting style is a carefully designed, efficient way of forming letters and numbers.

Each style has it’s own character or fits certain needs. There is no "correct" handwriting style—although publishers of handwriting programs or language arts programs might feel that theirs is the best! A handwriting chart or some other reference on how letters are formed (letter cards with the starting points and arrows, alphabet strips, iPad app) is a good reference tool to have available.

Handwriting Types

Simply be aware of letter formation and model it for your children or students. When given no instruction or example to follow, bright children can come up with some terribly awkward and cumbersome ways of making letters!


Oh, So Unique!

Whichever handwriting style or type is chosen, the personality of each child's handwriting is evident. 

One child may space letters wide. Another might slant their letters less than the child sitting next to them. Some tend toward narrow lettering. Then, there are those who have a confident flow to their writing. 

Our uniqueness shows in our handwriting. It is our style.

Training and Practice

Handwriting programs have instructions and books and gadgets and apps. For many people, it is not necessary or practical. The main thing is to help the child memorize the letter formation (there are many fun ways to do this) and have clear standards and expectations for their practice time.

These first and second-grade children learned to write together. They each show an individual style, and all are beautiful. The papers are from the end of their school year.

These first and second-grade children learned to write together. They each show an individual style, and all are beautiful. The papers are from the end of their school year.

Amanda's letters are wide.

Amanda uses wide spacing in her words and letters.

Joshua's writing has very little slant.

Joshua's writing has a slight slant.

Tyler's letters are narrow.

Tyler consistently forms narrow letters.

Elisa's writing flows.

Elisa has an effortless flow to her writing.